Photogeoref
Georeferencing oblique photography to a digital elevation model.
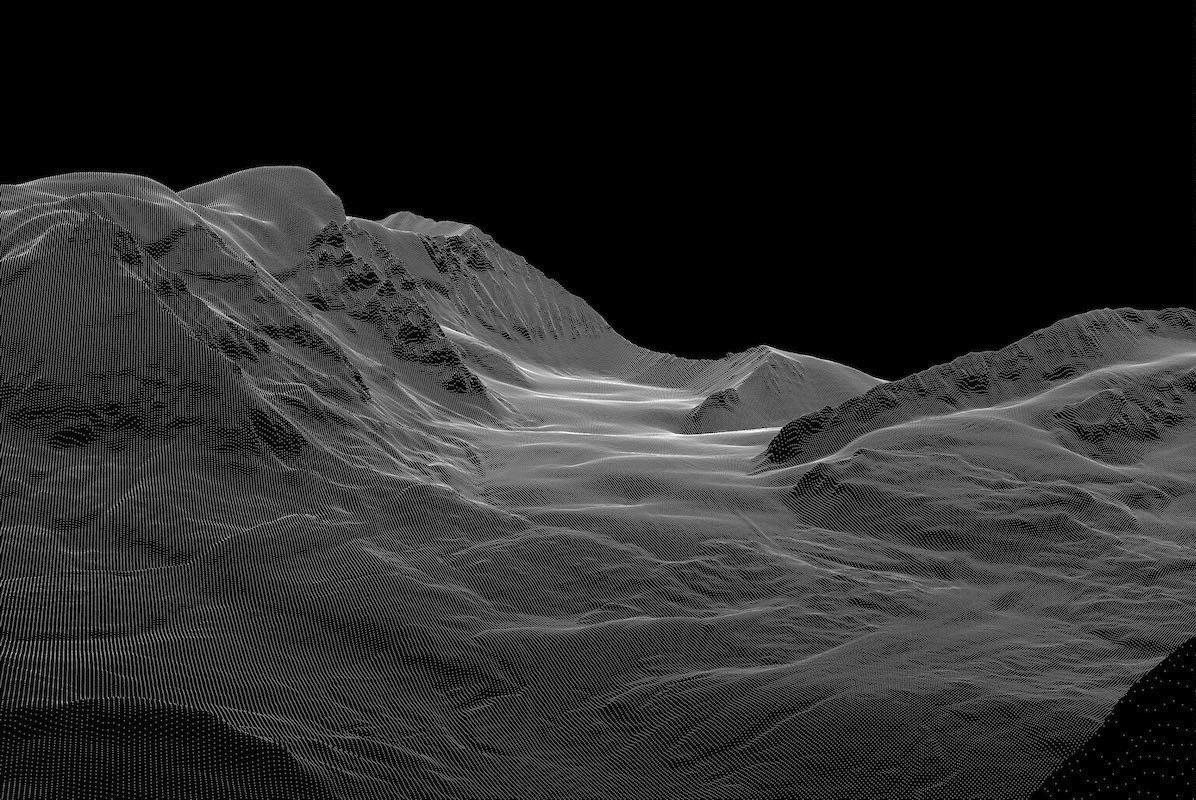
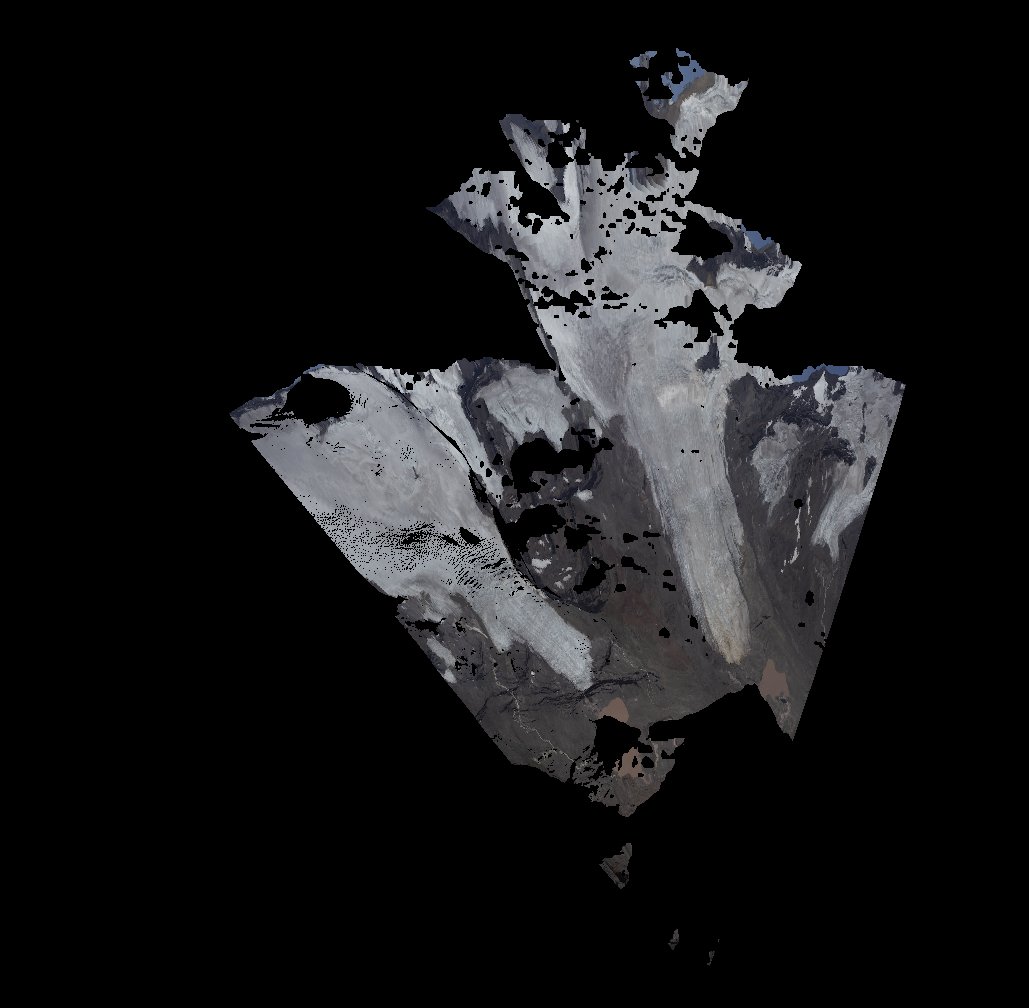
DEM from the camara perspective.
Jump to downloads.
Python implementation
photogeoref.py is a python script that creates a tkinter GUI to georeference oblique photography to a Digital Elevation Model (DEM).
Georeferencing oblique photography can be an efficient complement to remote sensing, or a good alternative when high resolution satellite images are too expensive. This technique works on cloudy and overcast days and can be applied to multispectral cameras with some modifications. It works better for mountain terrain, where the viewing angle is more perpendicular. For flat terrain or very slanting views the projection distortion can be excessive.
The tool works for any camera where focal length and sensor dimensions are well known. Precision is better with fixed focal length lenses. It might work with smart phones pictures, but distortion could be very high. The images can be pre-processed, to highlight regions of interest or enhance any attribute, such as vegetation, water bodies, rivers, avalanches, geomorphological or geological features, etc. It has been used to derive albedo from the snow, the snow line fluctuation, validating snow drift models, derive glacier flow, mapping avalanches, monitoring high altitude mining operations on glaciers, forestry and phenology studies, etc.
Overview
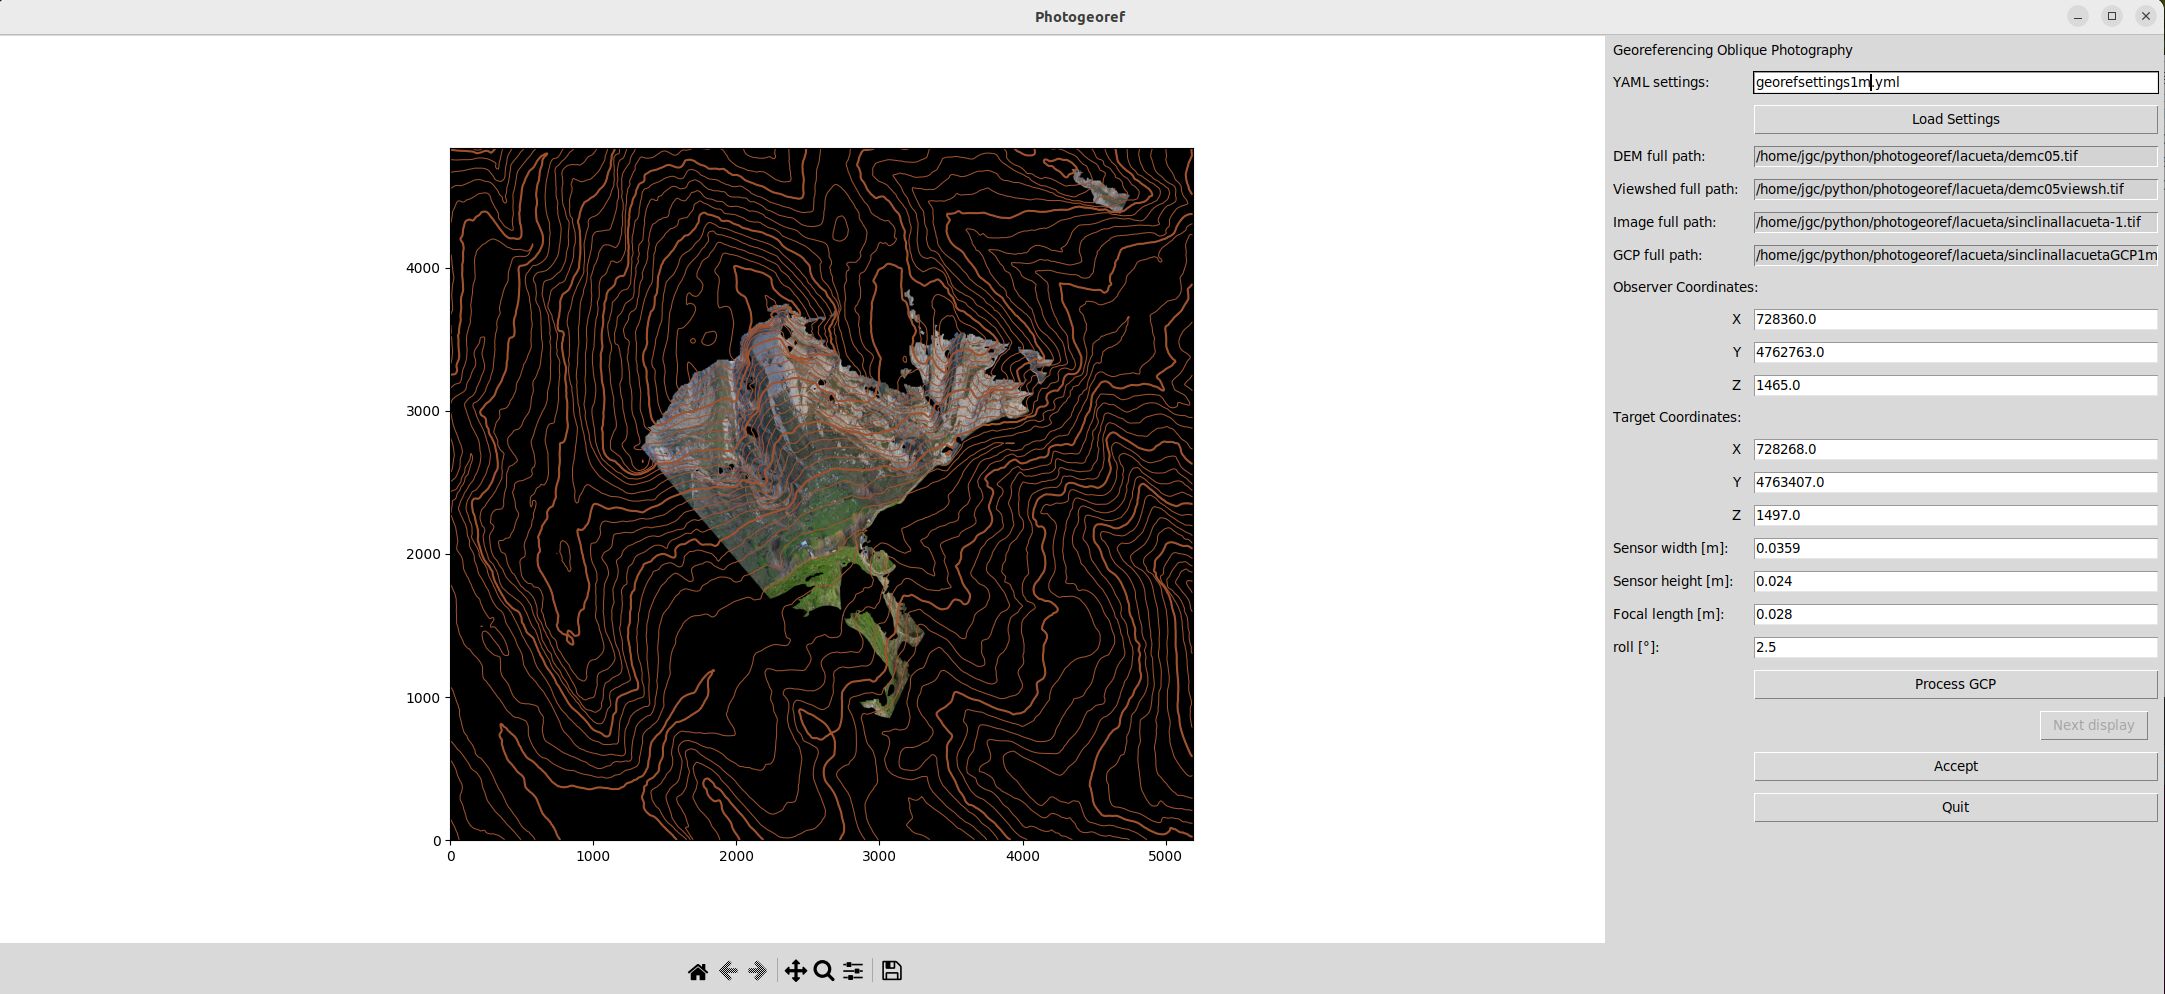
Runing the script will show a Graphical User Interface (GUI) where settings can be adjusted, the results are visualized on the display window.
python3 photogeoref.py -h
Shows the command syntax and available options.
Available options are:
options:
  -h, --help            show this help message and exit
  -s SETTINGS, --settings SETTINGS
                        Full path to yaml settings file
python3 photogeoref.py
Run script with default settings
Setings are written in a yaml file with the following structure:
cat georefsettings.yml
demfname: '/full_path_to/dem.tif
visfname: '/full_path_to/demviewshed.tif
imgfname: '/full_path_to/RGB_image.tif'
GCPfname: '/full_path_to/x_y_z_description.csv'
obscoords:
- 728360.0
- 4762763.0
- 1465.0
tgtcoords:
- 728268.0
- 4763407.0
- 1497.0
fwidth: 0.0359
fheight: 0.024
focallength: 0.028
roll: 2.5
demfname
Full path to a GeoTIFF with elevation data (DEM). \(\Delta X\), \(\Delta Y\) and \(Z\) should be in metres, DEM should be in UTM projection with squared pixels.
visfname
Full path to a GeoTIFF with the calculated DEM viewshed from the observer position. Visible values should be 1 and non-visible values zero. The script maps only visible cells in front of the camera and ignores grid cells that are behind the observer.
A simple way to calculate viewshed is with gdal:
gdal_viewshed -md 30000 -ox observerX -oy ObserverY -oz heightoverdem -vv 1 inputdem.tif outputviewshed.tif
imgfname
Full path to a RGB tiff with the photograph to be georeferenced. It should be the full image, not cropped. Images can be processed, contain annotations and modifications but dimensions should be preserved.
GCPfname
Full path to a comma-separated-values file (csv) with Ground Control Points. Each row in the file is X-coordinate, Y-coordinate, Z-coordinate, description. It is is advisable to include the observer and the target position.
obscoords
Array with the observer X, Y, Z coordinates (camera position). Observer coordinates should be inside the DEM domain and in the same reference system. Coordinates should be easting and northing in metres, not degrees of latitude or longitude.
tgtcoords
Array with the target X, Y, Z coordinates. The target is the real world position of the mid point of the photograph. Target coordinates should be inside the DEM domain and in the same reference system. Coordinates should be easting and northing in metres, not degrees of latitude or longitude.
fwidth
Camera sensor witdh in metres. This example is for a Nikkon D800 with full width sensor at ~36 x 24 mm, exactly 0.0359 m.
fheight
Camera sensor height in metres. This example is for a Nikkon D800 with full width sensor at ~36 x 24 mm, exactly 0.024 m.
focallength
Camera lens focal lentgh in metres. Compact cameras and zoon lenses can have a very different nominal and actual value, they can differ up to a 10%.
roll
Camera roll in degrees. If the camera is hand held, it is very difficult to keep it perfectly horizontal. The roll helps correcting lateral inclination of the camera. A negative roll will rotate the image to the right.
Usage
python3 photogeoref.py [-h] [-s SETTINGS]
Some examples are provided in the attached zip files with all the necessary files to run them.
options:
  -h, --help            show this help message and exit
  -s SETTINGS, --settings SETTINGS
                        Full path to yaml settings file
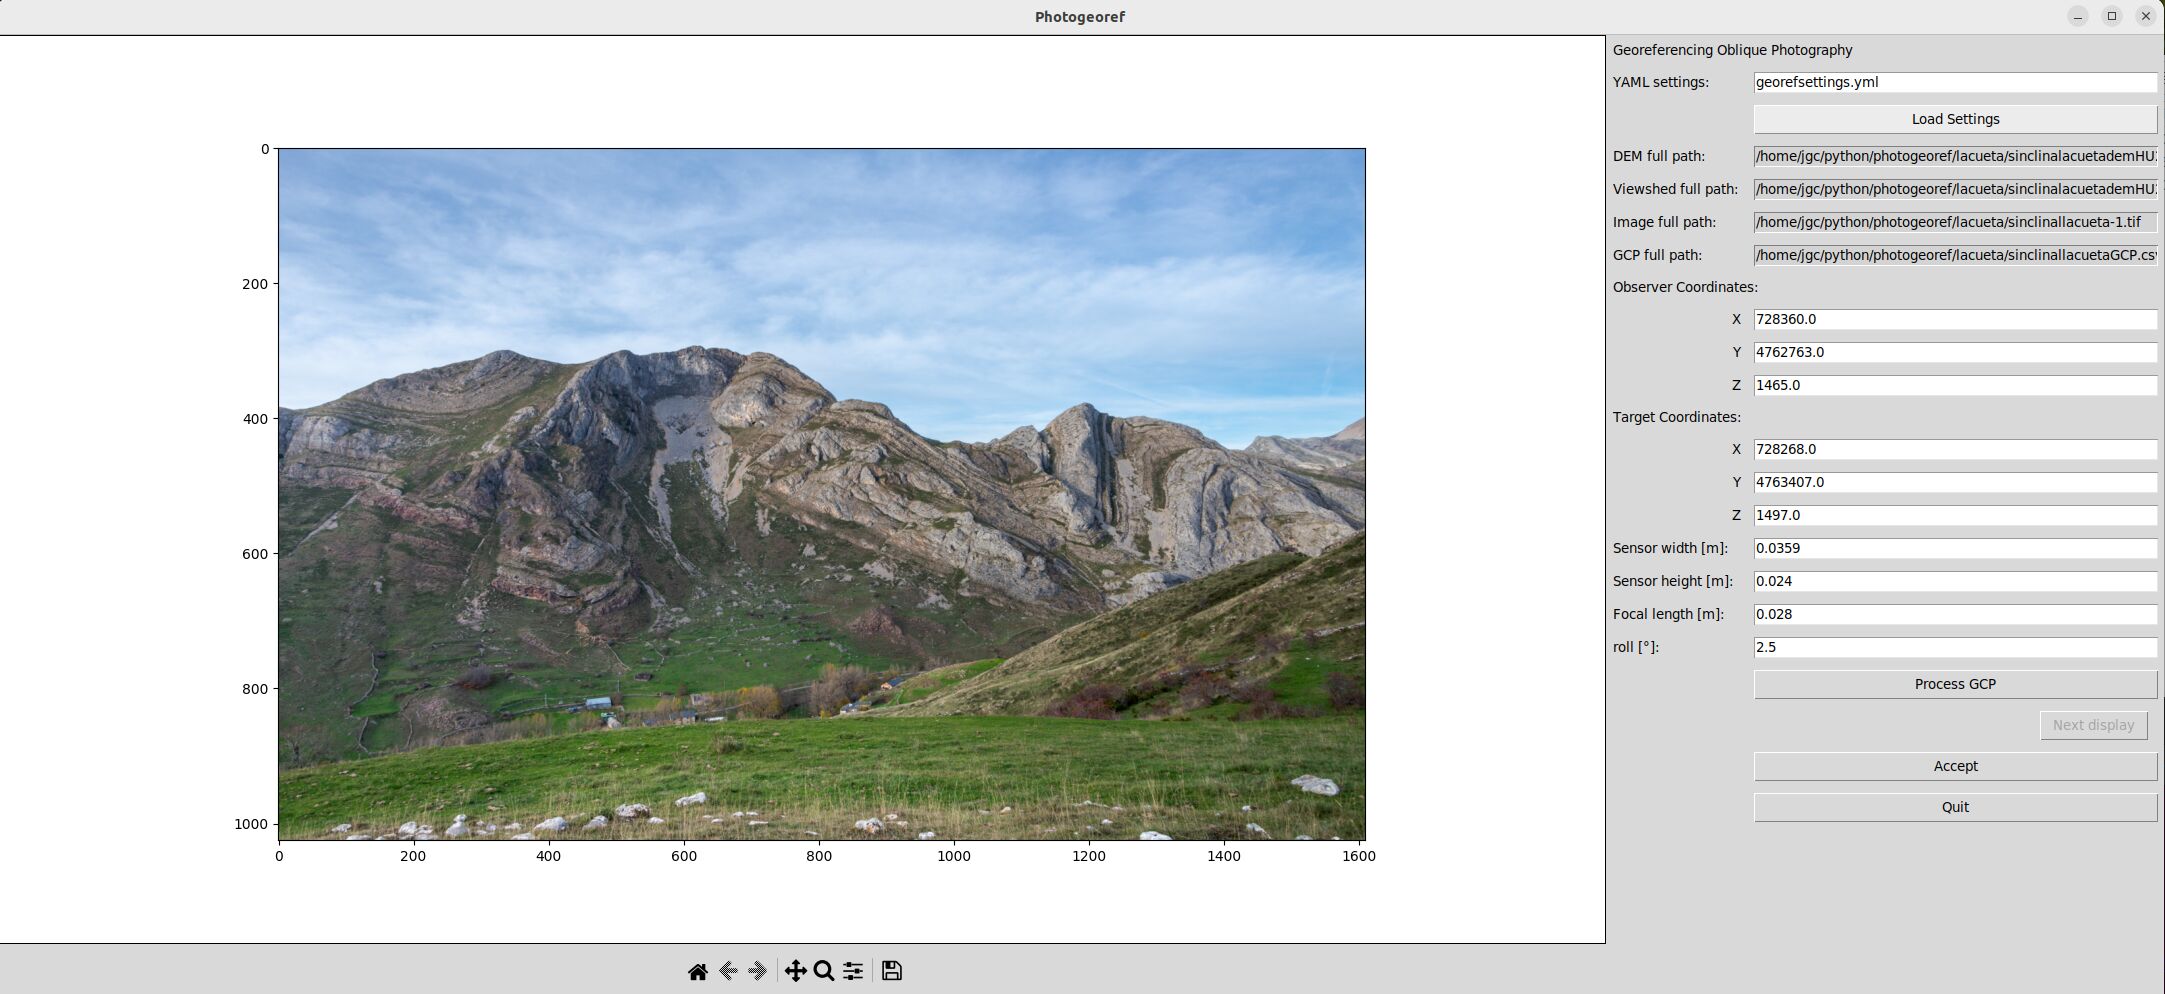
Calling the script will open a GUI with the default or prescribed settings file at the top entry field.
Check that the file is correct and exists and click the button "Load settings".
All fields should be populated and the photography displayed on the GUI canvas.
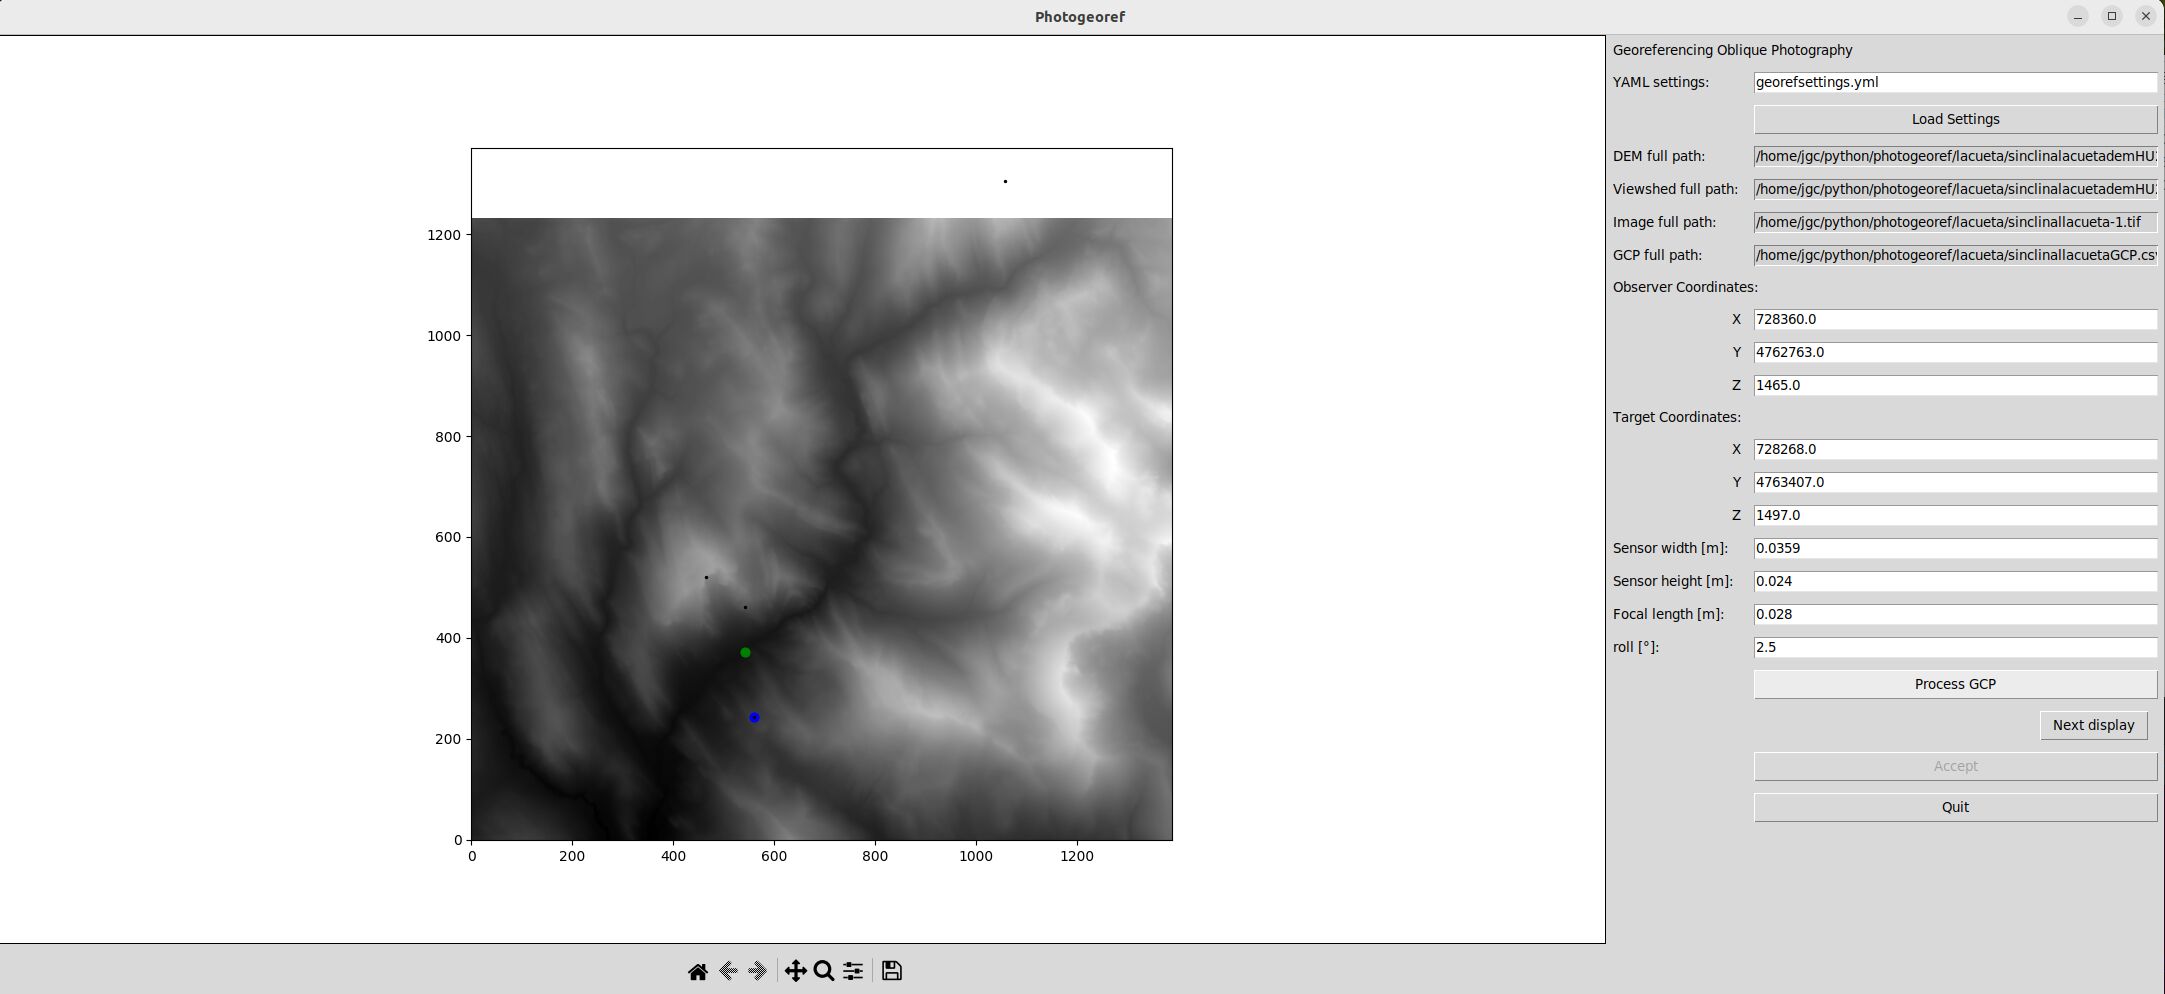
Click the button "Process GCP", a grey scale DEM should be displayed, with the camera position in blue, the target position in green and the GCP as black dots.
Click the button "Next display" to show the DEM as a perspective projection from the observer point of view. Click again to show the DEM grid points superimposed on the image.
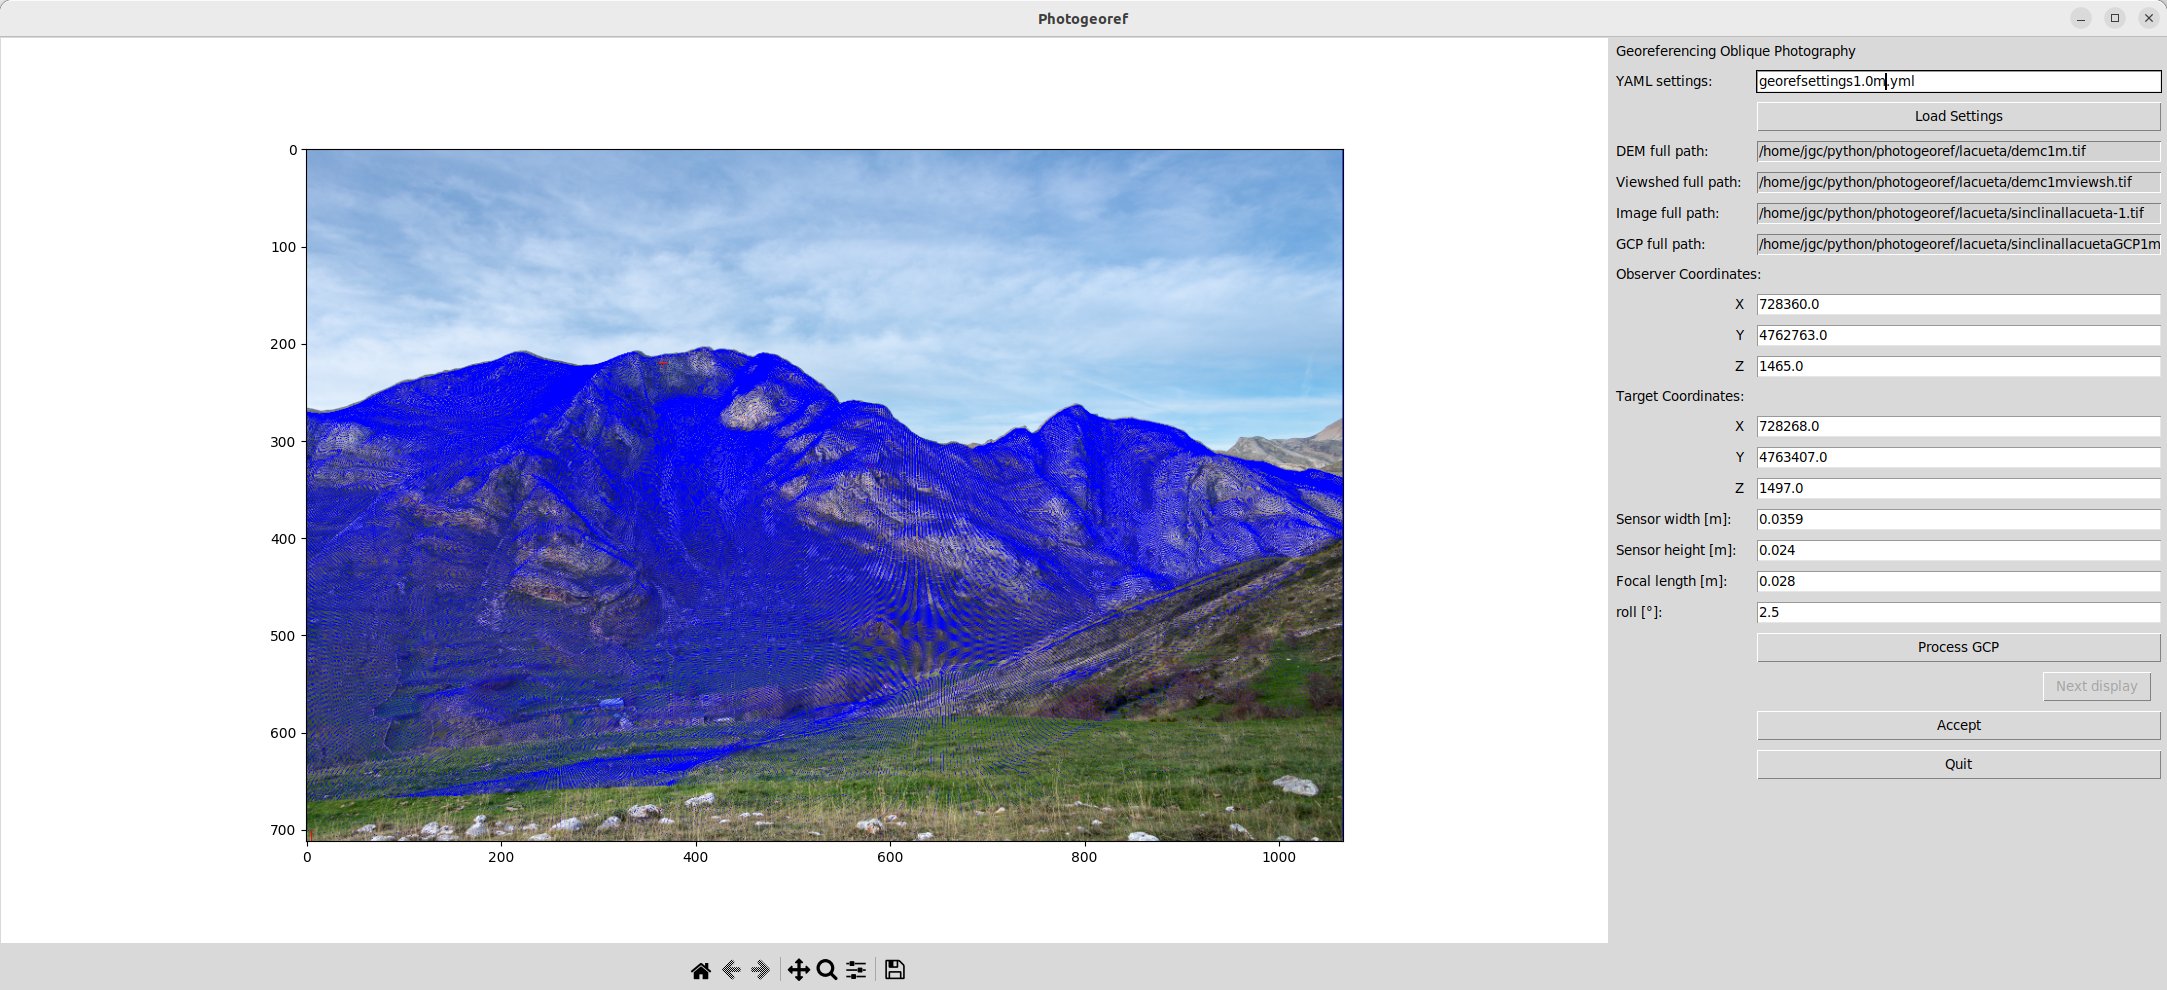
If the match between DEM and image is correct click on the "Accept button", a georeferenced image and contour lines will be displayed. If the match is not satisfactory, correct the values and click "Process GCP" until the match is correct.
Additional files are created:
- "[imagename]DEMGCP.jpg" DEM plot with target, observer and GCP
- "demperspective.png" a perspective projection of the DEM
- "[imagename]coimg.jpg" perspective projection of DEM superimposed on photograph
- "[imagename]refplot.png" georeferenced image with contour lines plot
- "[imagename]ref.tif" RGB GeoTIFF of georeferenced photograph with the same projection and extent as the original DEM
The script creates an additional log file "georefGCP.log" in the same folder as the photograph. The log registers different changes and the last settings used. Logs are appended, it is up to the user deleting the log file when it is too large or no longer needed.
At exit the script creates a new settings file with the last values used, the file name will be the last settings file provided plus a timestamp.
References
- Corripio, J. G. (2004) Snow surface albedo estimation using terrestrial photography, International Journal of Remote Sensing. 25(24), 5705-5729. [preprint]
Some of the applications are described in these papers: google scholar cites.
Requirements
- python 3x
- argparse
- copy
- cv2
- json
- matplotlib
- numpy
- os
- osgeo
- sys
- time
- tkinter
- urllib.request
- yaml
Installation
Just run the script with all the required python modules installed.
python3 photogeoref.py
Downloads
- photogeoref.py (zipped)
- example-1 geomorphological feature (zipped, includes script)
- example-2 geological feature (zipped, includes script)
- user manual, pdf
Some results
Georeferenced glaciers in the central Andes from an oblique land basd photography.